Which household does not have stuff? Stuff here and there and then you decide for more storage. Soon you find that stuff-virus has plagued every nook and cranny of your house.
All we can do is to keep that stuff organized enough so that we do not loose track of the Stuff. Last weekend I found and interesting subject on the topic. Enter, the big drawer:
So decided to partition this drawer so that at least some sort of organization is possible. Went out to shop and brought home the following:
Plans first. So I asked the stakeholders (mom and sister) what kind of partitioning they wanted. Based on that, a scale drawing was made:
Then it was time for measure and cut:
One problem I found was that the cardboard was too thin and not so rigid. So I decided to double them up and cut another set of identical partitions and glued them together:
Note one trick here. I applied the glue in a different pattern on both the boards so that when they are joined. The complementary empty spaces get the glue from the other side. Compare the two images above for number of horizontal lines of glue.
Now we have two sheets thick cardboard (craft-board) partitions:
Next came the installation. For that I decided to slit the partitions and wedge them together at 90 degree through he slots in each partition. For this, each partition should have slot exactly equal to the width of a partition halfway through. So I measured the partition by putting all three together and then divide total width by three (a middle school trick used to find thickness of a sheet of paper).
I also have vernier calipers but those would have been overkill for the job :-)
After test fit was okay, next comes the aesthetics. So I used a good quality decorative paper to cover the partitions and then re-fix them back:
Now for the final fit and fruit of the effort:
Addresses the my concerns pretty well. The whole deal took a couple of hours and less than 100 INR!
Thanks for reading this page.
-Tweaker
All we can do is to keep that stuff organized enough so that we do not loose track of the Stuff. Last weekend I found and interesting subject on the topic. Enter, the big drawer:
 |
| The drawer was a recipient for almost anything. |
So decided to partition this drawer so that at least some sort of organization is possible. Went out to shop and brought home the following:
- A sheet of craft cardboard
- Couple of sheets of wallpaper grade paper(preferably matching grain with the veneer)
- Some wood glue
- A blade
Plans first. So I asked the stakeholders (mom and sister) what kind of partitioning they wanted. Based on that, a scale drawing was made:
 |
| Top: Measurements. Bottom: Partitions drawn to 1/10 scale (1mm : 1 cm) |
 |
| Measurements had to be accurate to a millimeter for a perfect fit |
 |
| Cuts were made using a standard guided -cutter method |
 |
| So based on plan, we have identical pieces. Diff lengths though |
 |
| Apply glue |
 |
| After some wriggling of the pieces |
Note one trick here. I applied the glue in a different pattern on both the boards so that when they are joined. The complementary empty spaces get the glue from the other side. Compare the two images above for number of horizontal lines of glue.
 |
| Put some pressure. This time books cause physical pressure :-) |
 |
| Partitions ready |
I also have vernier calipers but those would have been overkill for the job :-)
 |
| Measure thickness of three to find out thickness of one |
 |
| Drawings of slits to fit into each other orthogonally. The shaded part will go away. |
 |
| Patience was needed for this. I used scale as guide and carefully cut them. |
 |
| All three partitions ready. Note here a slight wedge in the lowest partition. This makes the edge. |
 |
| Testing the slots. Now you got the idea! :-) |
 |
| Perfect! But not done yet. |
 |
| Was lucky to find a pattern matching the drawer face and cabinet |
 |
| Must glue around the edges |
 |
| Folding the edges took some more patience. I had to hold the edge to provide some time to the glue to stick on. |
 |
| All done! |
 |
| Looks cool. Fit was really snug. No glue at this point. |
 |
| Assembled and commissioned :-) |
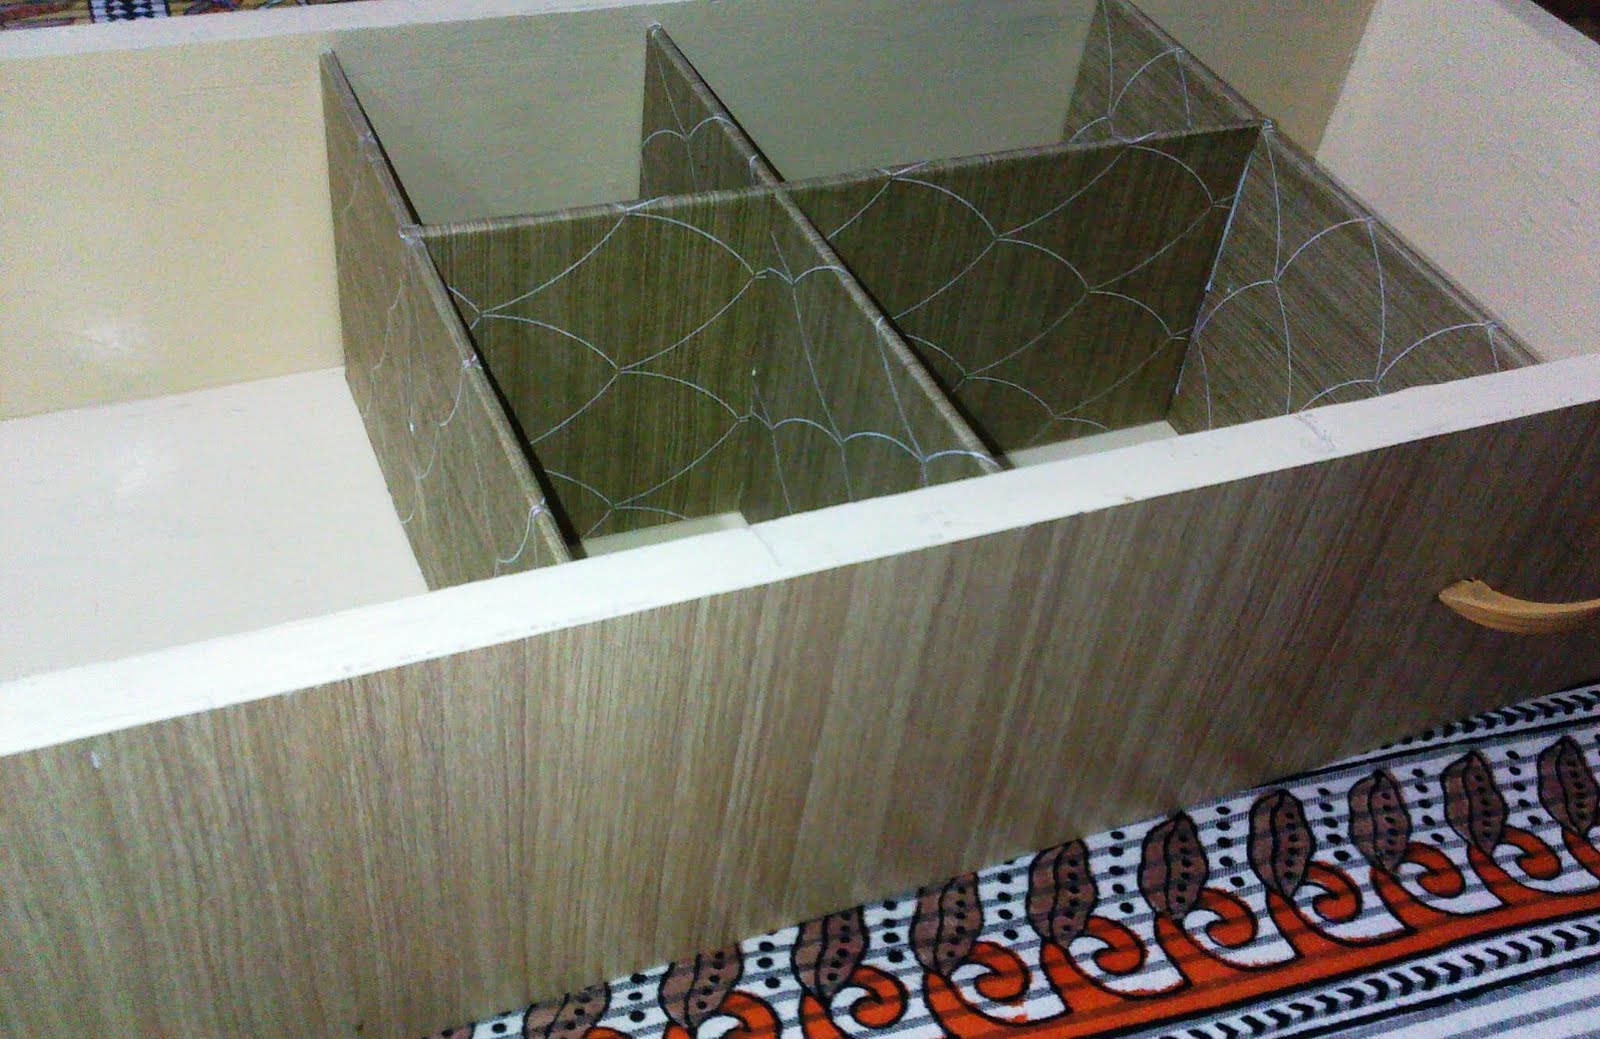 |
| Another view |
 |
| Finally, in use. |
 |
| Another view |
Thanks for reading this page.
-Tweaker
No comments:
Post a Comment